Fulcio
Now it's time to install the Fulcio WebPKI.
Fulcio requires a means to manage certificates. We have two options here, we can use a SoftHSM or Google Certificate Authority service.
📝 As of time of writing, plans are in place to support AWS Cloud HSM and Azure Dedicated HSM.
SSH into the Fulcio Compute instance
gcloud compute ssh sigstore-fulcio
Dependencies
We need a few dependencies installed
Update your system
sudo apt-get update -y
If you want to save up some time, remove man-db first
sudo apt-get remove -y --purge man-db
Grab the following packages
sudo apt-get install git gcc haproxy softhsm certbot opensc -y
📝 If you plan to use GCP Certificate Service, you can drop SoftHSM and opensc
Install latest golang compiler
Download and run the golang installer (system package are often older than what Fulcio requires):
curl -O https://storage.googleapis.com/golang/getgo/installer_linux
chmod +x installer_linux
./installer_linux
e.g.
Welcome to the Go installer!
Downloading Go version go1.20.4 to /home/luke/.go
This may take a bit of time...
Downloaded!
Setting up GOPATH
GOPATH has been set up!

One more thing! Run `source /home/$USER/.bash_profile` to persist the
new environment variables to your current session, or open a
new shell prompt.
As suggested run
source /home/$USER/.bash_profile
go version
go version go1.20.4 linux/amd64
Install Fulcio
go install github.com/sigstore/fulcio@v1.3.1
sudo cp ~/go/bin/fulcio /usr/local/bin/
Let's encrypt (TLS) & HA Proxy config
Let's create a HAProxy config, set DOMAIN to your registered domain and your
private IP address
DOMAIN="fulcio.example.com"
IP="10.240.0.11"
Let's now run certbot to obtain our TLS certs.
sudo certbot certonly --standalone --preferred-challenges http \
      --http-01-address ${IP} --http-01-port 80 -d ${DOMAIN} \
      --non-interactive --agree-tos --email youremail@domain.com
Move the PEM chain into place
sudo cat "/etc/letsencrypt/live/${DOMAIN}/fullchain.pem" \
    "/etc/letsencrypt/live/${DOMAIN}/privkey.pem" \
    | sudo tee "/etc/ssl/private/${DOMAIN}.pem" > /dev/null
Now we need to change certbot configuration for automatic renewal
Prepare post renewal script
cat /etc/letsencrypt/renewal-hooks/post/haproxy-ssl-renew.sh
#!/bin/bash

DOMAIN="fulcio.example.com"

cat "/etc/letsencrypt/live/${DOMAIN}/fullchain.pem" \
    "/etc/letsencrypt/live/${DOMAIN}/privkey.pem" \
    > "/etc/ssl/private/${DOMAIN}.pem"

systemctl reload haproxy.service
Make sure the script has executable flag set
sudo chmod +x /etc/letsencrypt/renewal-hooks/post/haproxy-ssl-renew.sh
Replace port and address in the certbot's renewal configuration file for the domain (pass ACME request through the haproxy to certbot)
sudo vim /etc/letsencrypt/renewal/fulcio.example.com.conf
http01_port = 9080
http01_address = 127.0.0.1
Append new line
post_hook = /etc/letsencrypt/renewal-hooks/post/haproxy-ssl-renew.sh
Prepare haproxy configuration
cat > haproxy.cfg <<EOF
defaults
    timeout connect 10s
    timeout client 30s
    timeout server 30s
    log global
    mode http
    option httplog
    maxconn 3000
    log 127.0.0.1 local0

frontend haproxy
    #public IP address
    bind ${IP}:80
    bind ${IP}:443 ssl crt /etc/ssl/private/${DOMAIN}.pem

    # HTTPS redirect
    redirect scheme https code 301 if !{ ssl_fc }

    acl letsencrypt-acl path_beg /.well-known/acme-challenge/
    use_backend letsencrypt-backend if letsencrypt-acl

    default_backend sigstore_fulcio

backend sigstore_fulcio
    server sigstore_fulcio_internal 0.0.0.0:5000

backend letsencrypt-backend
    server certbot_internal 127.0.0.1:9080
EOF
Inspect the resulting haproxy.cfg and make sure everything looks correct.
If so, copy it into place
sudo cp haproxy.cfg /etc/haproxy/
Check syntax
sudo /usr/sbin/haproxy -c -V -f /etc/haproxy/haproxy.cfg
Start HAProxy
Let's now start HAProxy
sudo systemctl enable haproxy.service
sudo systemctl restart haproxy.service
sudo systemctl status haproxy.service
The above should print:
Synchronizing state of haproxy.service with SysV service script with /lib/systemd/systemd-sysv-install.
Executing: /lib/systemd/systemd-sysv-install enable haproxy
● haproxy.service - HAProxy Load Balancer
   Loaded: loaded (/lib/systemd/system/haproxy.service; enabled; vendor preset: enabled)
   Active: active (running) since Sun 2021-07-18 10:12:28 UTC; 58min ago
     Docs: man:haproxy(1)
           file:/usr/share/doc/haproxy/configuration.txt.gz
 Main PID: 439 (haproxy)
    Tasks: 2 (limit: 2322)
   Memory: 4.1M
   CGroup: /system.slice/haproxy.service
           ├─439 /usr/sbin/haproxy -Ws -f /etc/haproxy/haproxy.cfg -p /run/haproxy.pid
           └─444 /usr/sbin/haproxy -Ws -f /etc/haproxy/haproxy.cfg -p /run/haproxy.pid

Jul 18 10:12:27 sigstore-fulcio systemd[1]: Starting HAProxy Load Balancer...
Jul 18 10:12:28 sigstore-fulcio systemd[1]: Started HAProxy Load Balancer.
Test automatic renewal
sudo certbot renew --dry-run
File CA setup
First we need to generate some keys and a root CA
openssl ecparam -genkey -name prime256v1 -noout -out unenc.key
openssl ec -in unenc.key -out file_ca_key.pem -des3
openssl ec -in file_ca_key.pem -pubout -out file_ca_pub.pem
openssl req -new -x509 -days 365 -extensions v3_ca -key file_ca_key.pem -out fulcio-root.pem
rm unenc.key
Copy all of the above key artifacts into $HOME/fulcio-config/config
Note You will need the file_ca_pub.pem file for the TUF root of cosign, with the sign-container section towards the end
SoftHSM Installation
By default SoftHSM stores tokens in
/var/lib/softhsm/tokens/directory, which is defined in/etc/softhsm/softhsm2.confconfiguration file, below we will define a custom configuration for fulcio.
mkdir -p $HOME/fulcio-config/config
mkdir $HOME/fulcio-config/tokens
cat <<EOF | tee $HOME/fulcio-config/config/softhsm2.cfg > /dev/null
directories.tokendir = $HOME/fulcio-config/tokens
objectstore.backend = file
log.level = INFO
slots.removable = false
EOF
export SOFTHSM2_CONF="$HOME/fulcio-config/config/softhsm2.cfg"
echo 'export SOFTHSM2_CONF="$HOME/fulcio-config/config/softhsm2.cfg"' >> ~/.bash_profile
softhsm2-util --init-token --slot 0 --label fulcio --pin 2324 --so-pin 2324
Tokens will now be generated in fulcio-config\tokens
ls -la $HOME/fulcio-config/tokens
For example:
softhsm2-util --init-token --slot 0 --label fulcio
=== SO PIN (4-255 characters) ===
Please enter SO PIN: ****
Please reenter SO PIN: ****
=== User PIN (4-255 characters) ===
Please enter user PIN: ****
Please reenter user PIN: ******
ERROR: The entered PINs are not equal.
=== User PIN (4-255 characters) ===
Please enter user PIN: ****
Please reenter user PIN: ****
The token has been initialized and is reassigned to slot 1773686385
Lets create a SoftHSM config for Fulcio
cat <<EOF | tee $HOME/fulcio-config/config/crypto11.conf > /dev/null
{
  "Path" : "/usr/lib/softhsm/libsofthsm2.so",
  "TokenLabel": "fulcio",
  "Pin" : "2324"
}
EOF
Note The Path may vary for different OS versions.
Now let's create a private key within the HSM
pkcs11-tool --module /usr/lib/softhsm/libsofthsm2.so --login --login-type user --keypairgen --id 1 --label PKCS11CA --key-type EC:secp384r1
For example:
pkcs11-tool --module /usr/lib/softhsm/libsofthsm2.so --login --login-type user --keypairgen --id 1 --label PKCS11CA --key-type EC:secp384r1
Using slot 0 with a present token (0x69b84e71)
Logging in to "fulcio".
Please enter User PIN:
Key pair generated:
Private Key Object; EC
label:      PKCS11CA
ID:         01
Usage:      decrypt, sign, unwrap, derive
Access:     sensitive, always sensitive, never extractable, local
Public Key Object; EC  EC_POINT 384 bits
EC_POINT:   046104b04911577ad1a655ba469b32ae63832d6c0d19482058af1822c2b42f54934da3613cd87171594a9b00ff1f0b298c75fa9383470ec46f0b4a35e73b54c34cf2ecc664ada2d0a818a5ac2390d952cb3b8d66ebea974a1bb2465f323cbebc50927d
EC_PARAMS:  06052b81040022
label:      PKCS11CA
ID:         01
Usage:      encrypt, verify, wrap, derive
Access:     local
Now its time to create a Root CA using our newly minted private key:
cd $HOME/fulcio-config/
fulcio createca --org={ORG} --country={UK} --locality={TOWN} --province={PROVINCE} --postal-code={POST_CODE} --street-address={STREET} --hsm-caroot-id 1 --out fulcio-root.pem
An example:
cd $HOME/fulcio-config/
fulcio createca --org=acme --country=USA --locality=Anytown --province=AnyPlace --postal-code=ABCDEF --street-address=123 Main St --hsm-caroot-id 1 --out fulcio-root.pem
2021-10-01T18:09:16.284Z        INFO    app/createca.go:48      binding to PKCS11 HSM
2021-10-01T18:09:16.289Z        INFO    app/createca.go:68      finding slot for private key: PKCS11CA
2021-10-01T18:09:16.304Z        INFO    app/createca.go:108     Root CA:
-----BEGIN CERTIFICATE-----
MIICJDCCAaqgAwIBAgIIVUu5cbwBx8EwCgYIKoZIzj0EAwMwVjELMAkGA1UEBhMC
TFYxCzAJBgNVBAgTAkxWMQswCQYDVQQHEwJMVjENMAsGA1UECRMESG9tZTEPMA0G
A1UEERMGTFYxMDI2MQ0wCwYDVQQKEwRhY21lMB4XDTIxMTAwMTE4MDkxNloXDTMx
MTAwMTE4MDkxNlowVjELMAkGA1UEBhMCTFYxCzAJBgNVBAgTAkxWMQswCQYDVQQH
EwJMVjENMAsGA1UECRMESG9tZTEPMA0GA1UEERMGTFYxMDI2MQ0wCwYDVQQKEwRh
Y21lMHYwEAYHKoZIzj0CAQYFK4EEACIDYgAEk4wYXHkLhdDlUlASZc65GI+5VDv3
OqmFdOI7/TwnPfrqFBNCxTPp0qNh7//s55tRac5pkXV4Af+xWUETlRd6RqBKcjjX
PHMZ0f+J/pZui4pPmw3ItvVCqfmNvCtASksSo0UwQzAOBgNVHQ8BAf8EBAMCAQYw
EgYDVR0TAQH/BAgwBgEB/wIBATAdBgNVHQ4EFgQUOXQnhKM/yhGTICrrgO78QyVN
nUMwCgYIKoZIzj0EAwMDaAAwZQIwEd1VjWI+P3eXMwUOGXbWJMYzrpcLakwj0JPW
Bx6oFXBadm4jZoKQX1FfNXMWgu0mAjEA4nz6OBtF8YJGRS9bTnWfe4V/lwukRczk
OPl9CeCgaJqQRXlMSw8uf3nO0rYXTGCF
-----END CERTIFICATE-----

2021-10-01T18:09:16.324Z        INFO    app/createca.go:122     root CA created with PKCS11 ID: 1
2021-10-01T18:09:16.324Z        INFO    app/createca.go:138     root CA saved to file: fulcio-root.pem
Check Root CA key usage
openssl x509 -in fulcio-root.pem -noout -ext extendedKeyUsage,keyUsage
X509v3 Key Usage: critical
    Certificate Sign, CRL Sign
Transfer the root certificate over to the certificate transparency log (or copy / paste into a text file for later).
gcloud compute scp fulcio-root.pem <google_account_name>@sigstore-ctl:~/
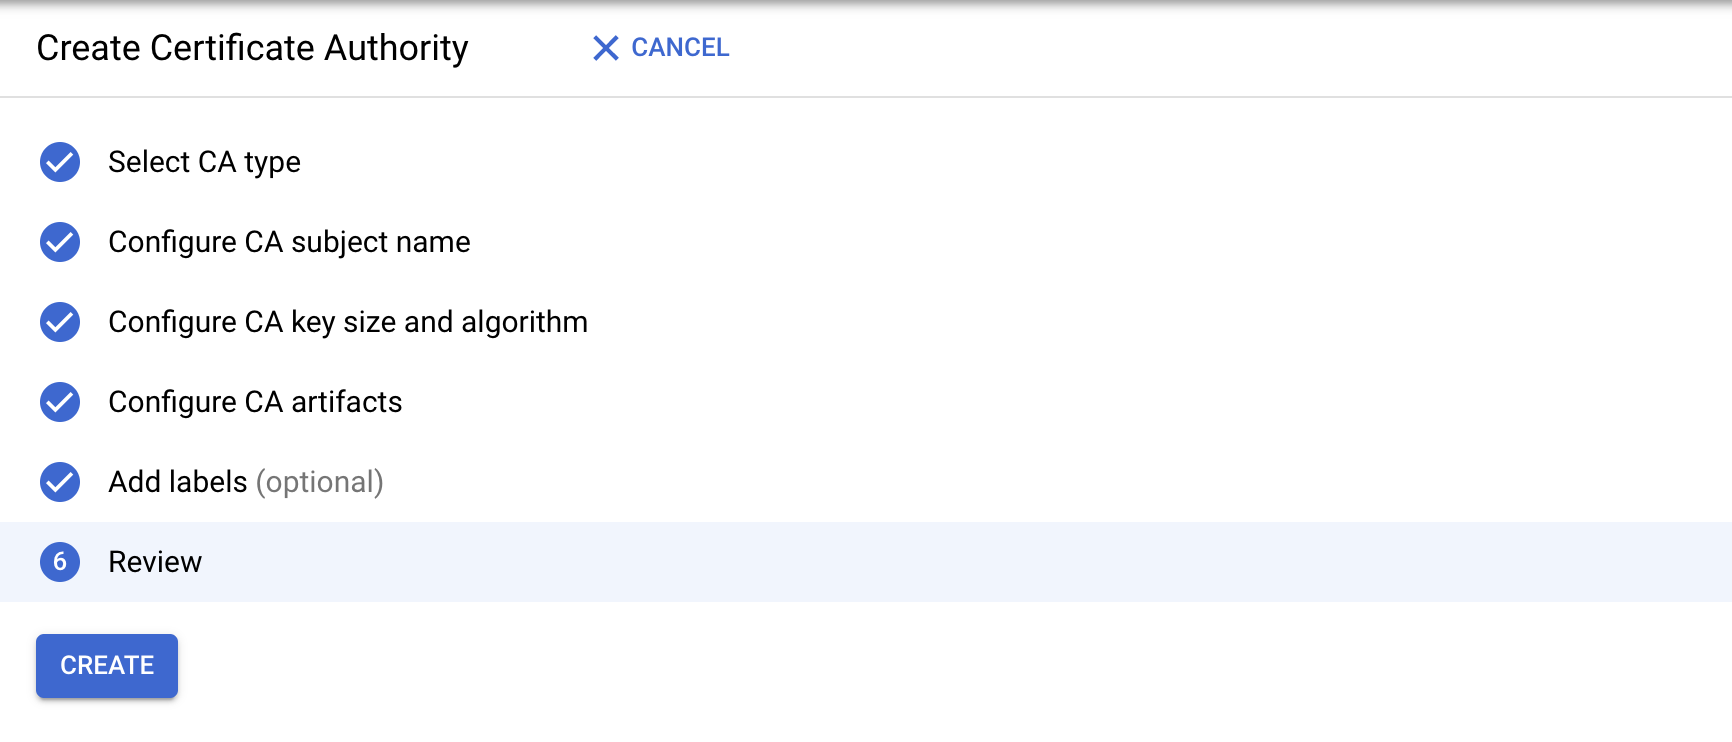
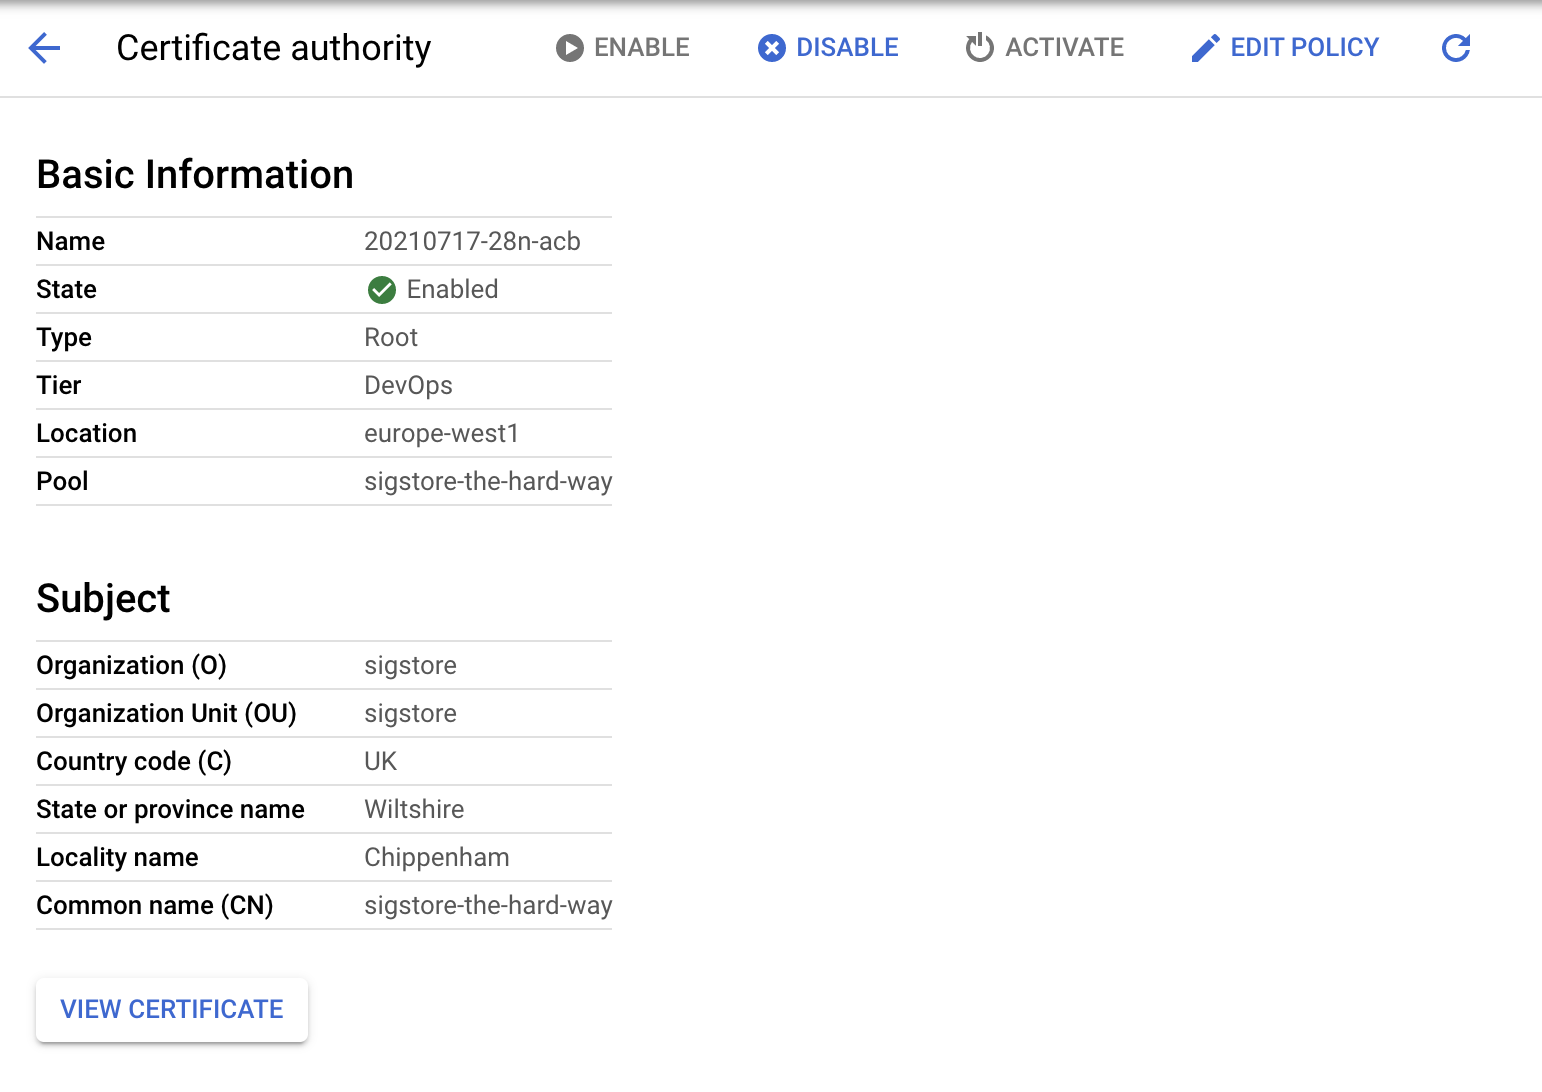
Google Certificate Authority Service
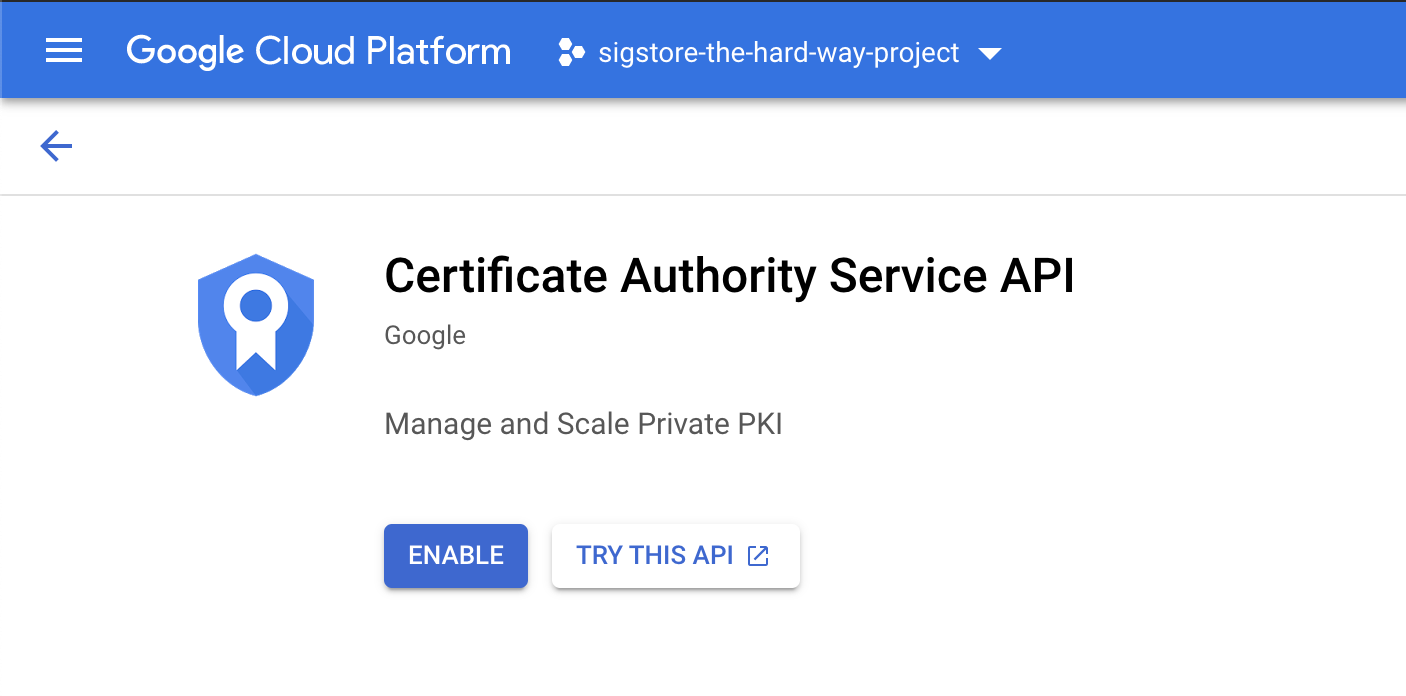
Navigate to the Certificate Authority Service API and enable the service
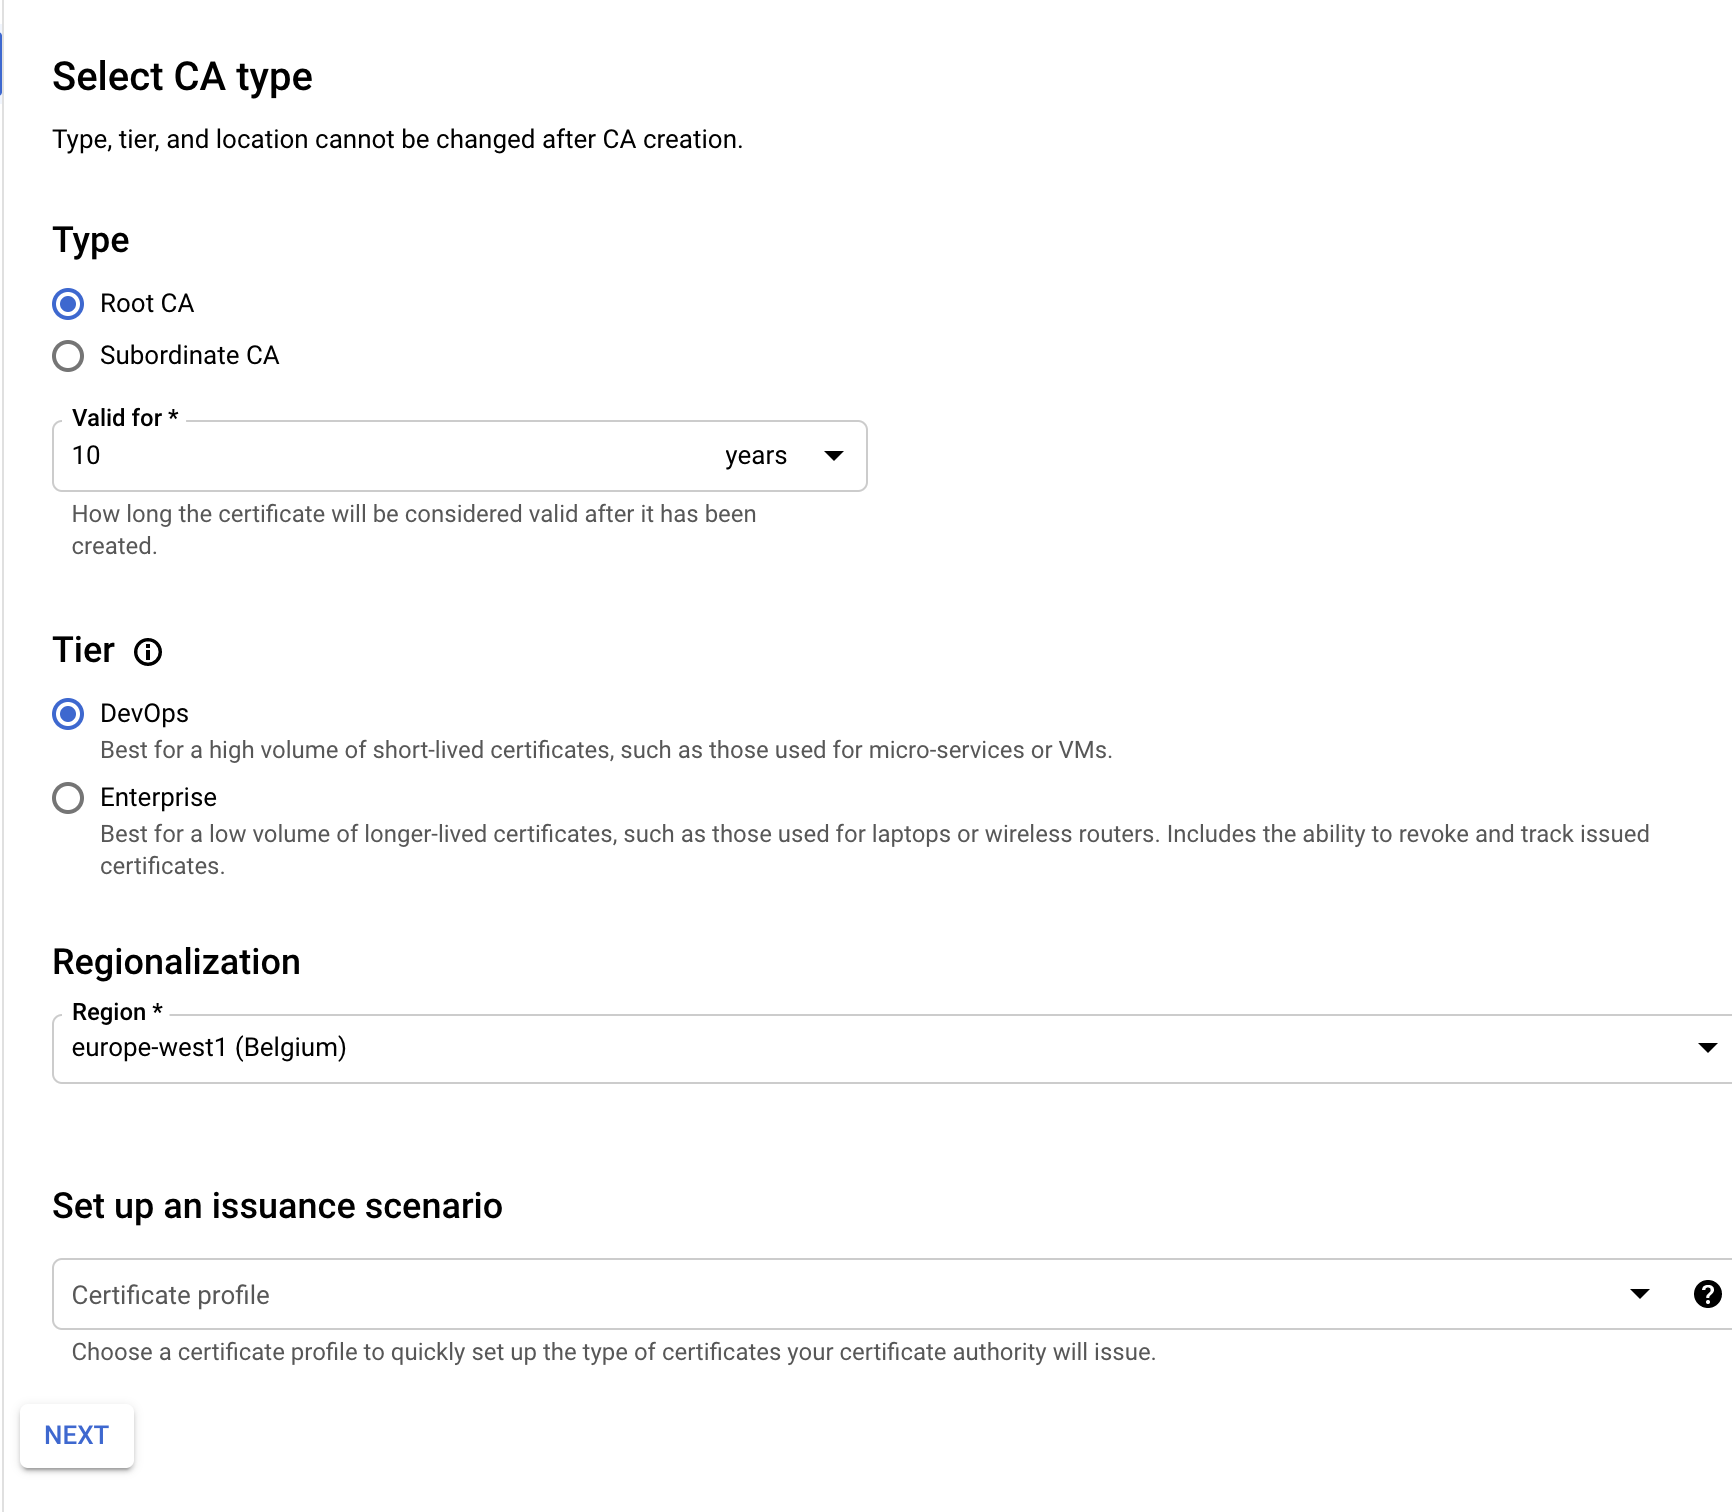
On the Google Cloud Console page, go to Security > Certificate Authority Service > Create CA
-
Set the CA type (DevOps)
-
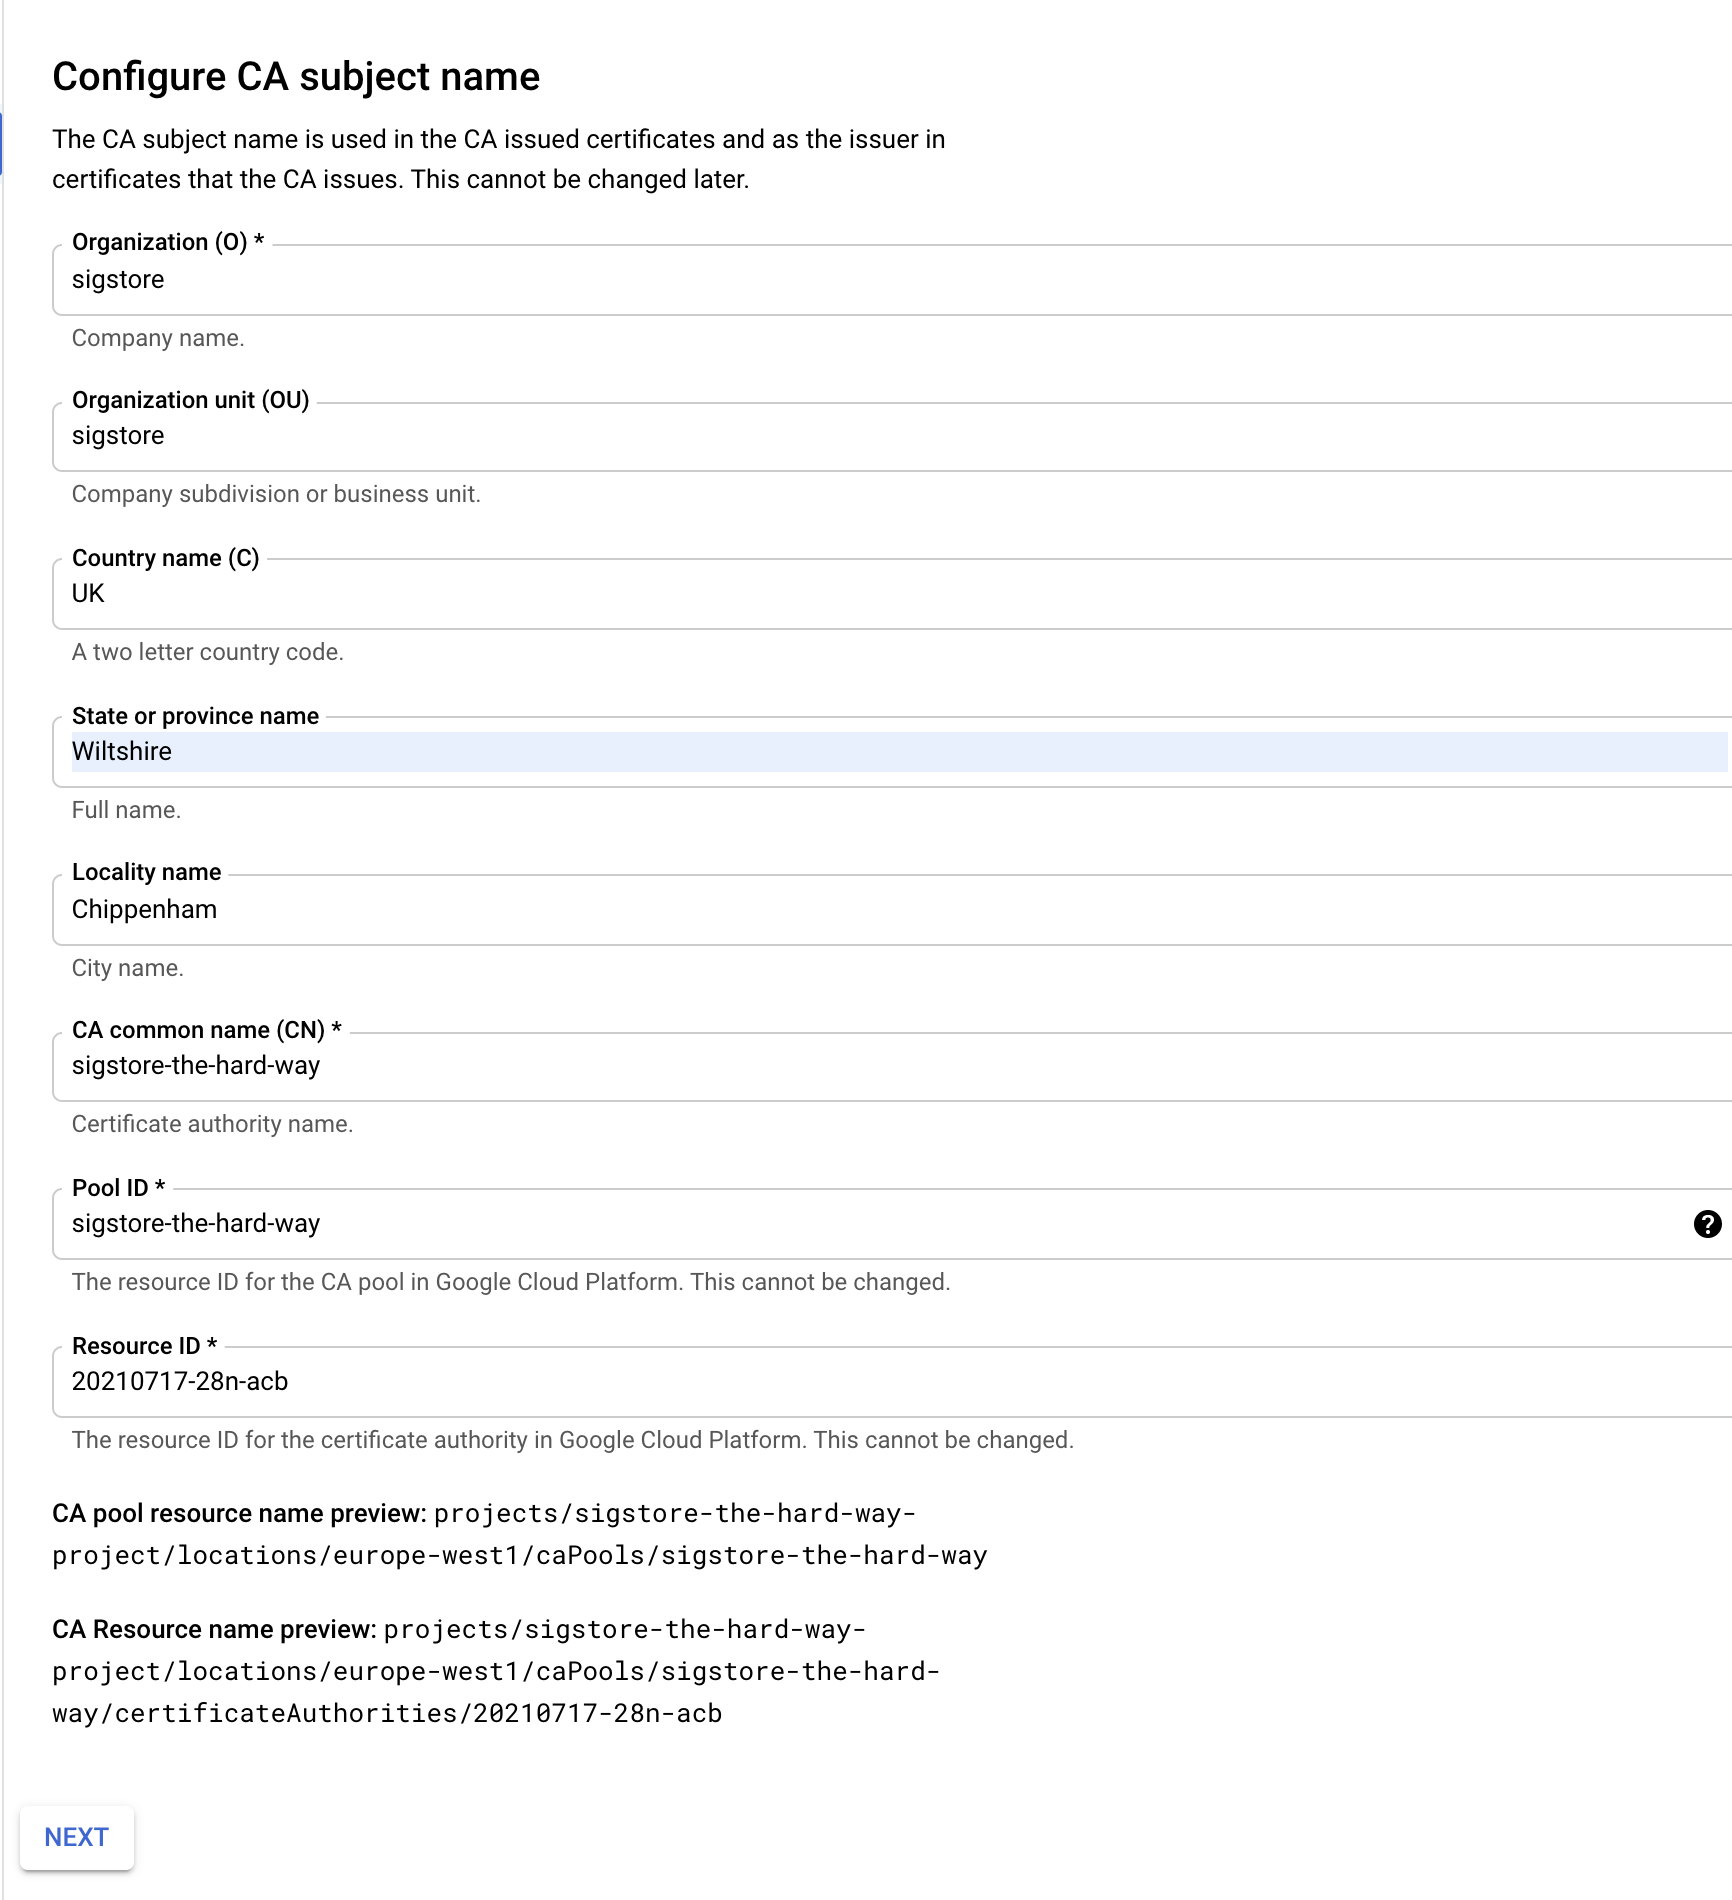
Set the cert subject details
-
Set the key and algorithm to Ecliptic Curve P384

-
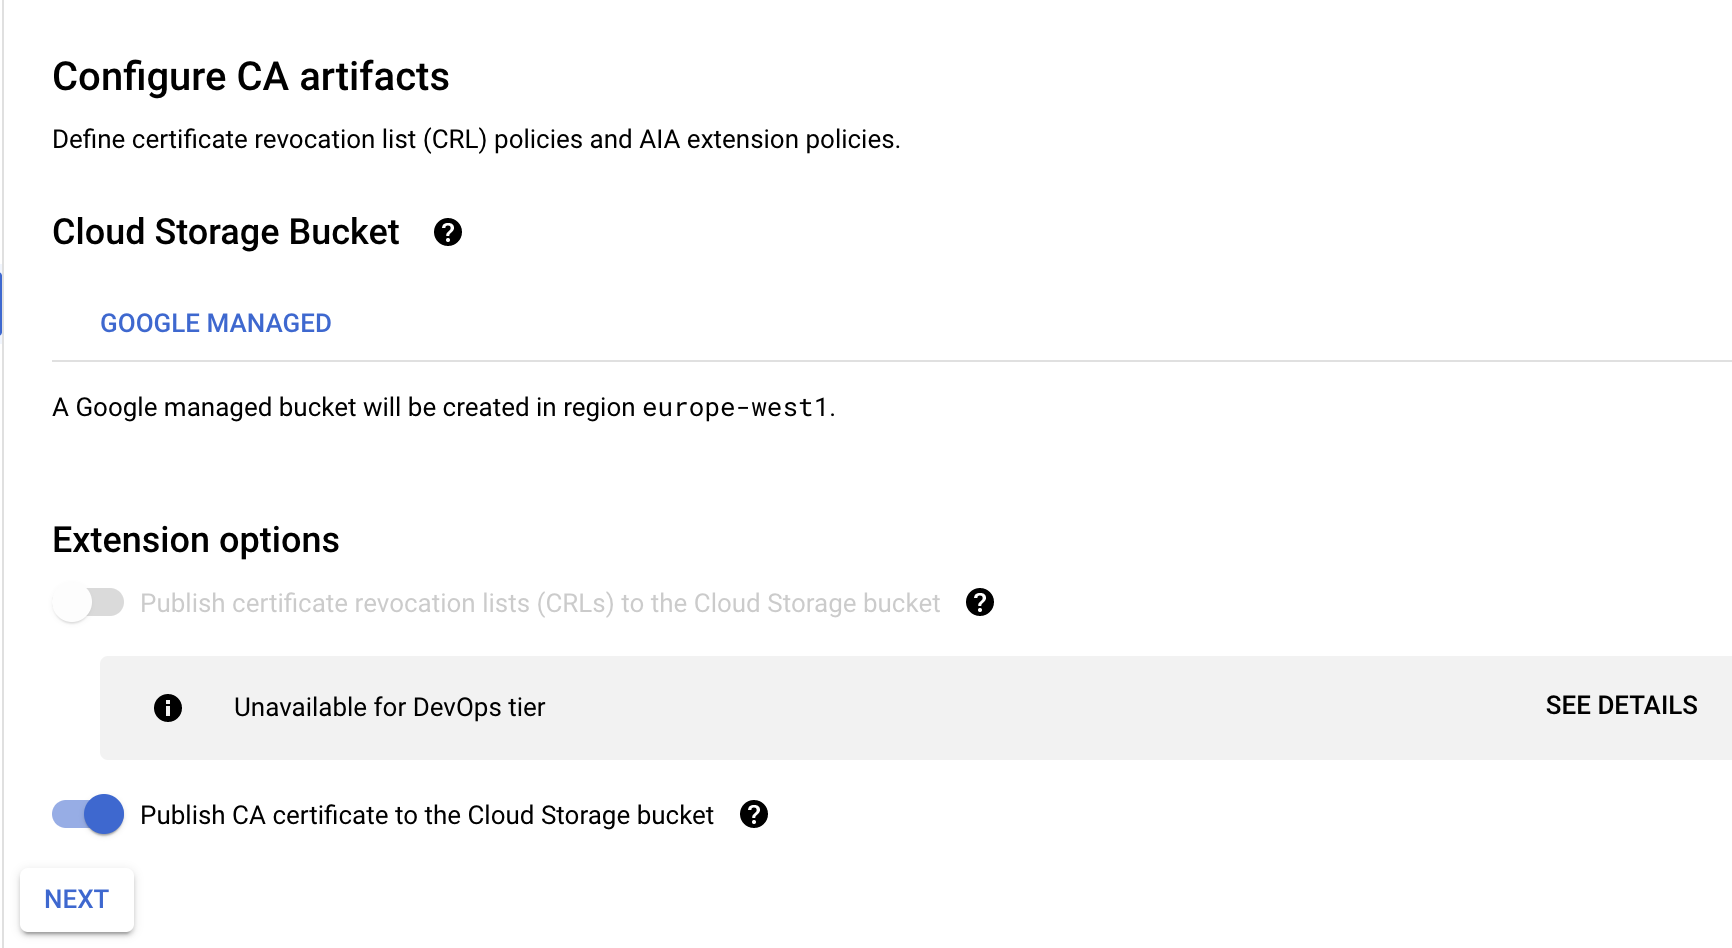
Leave Configure Artifacts as it is
-
Label (don't need one)

-
Create the CA
-
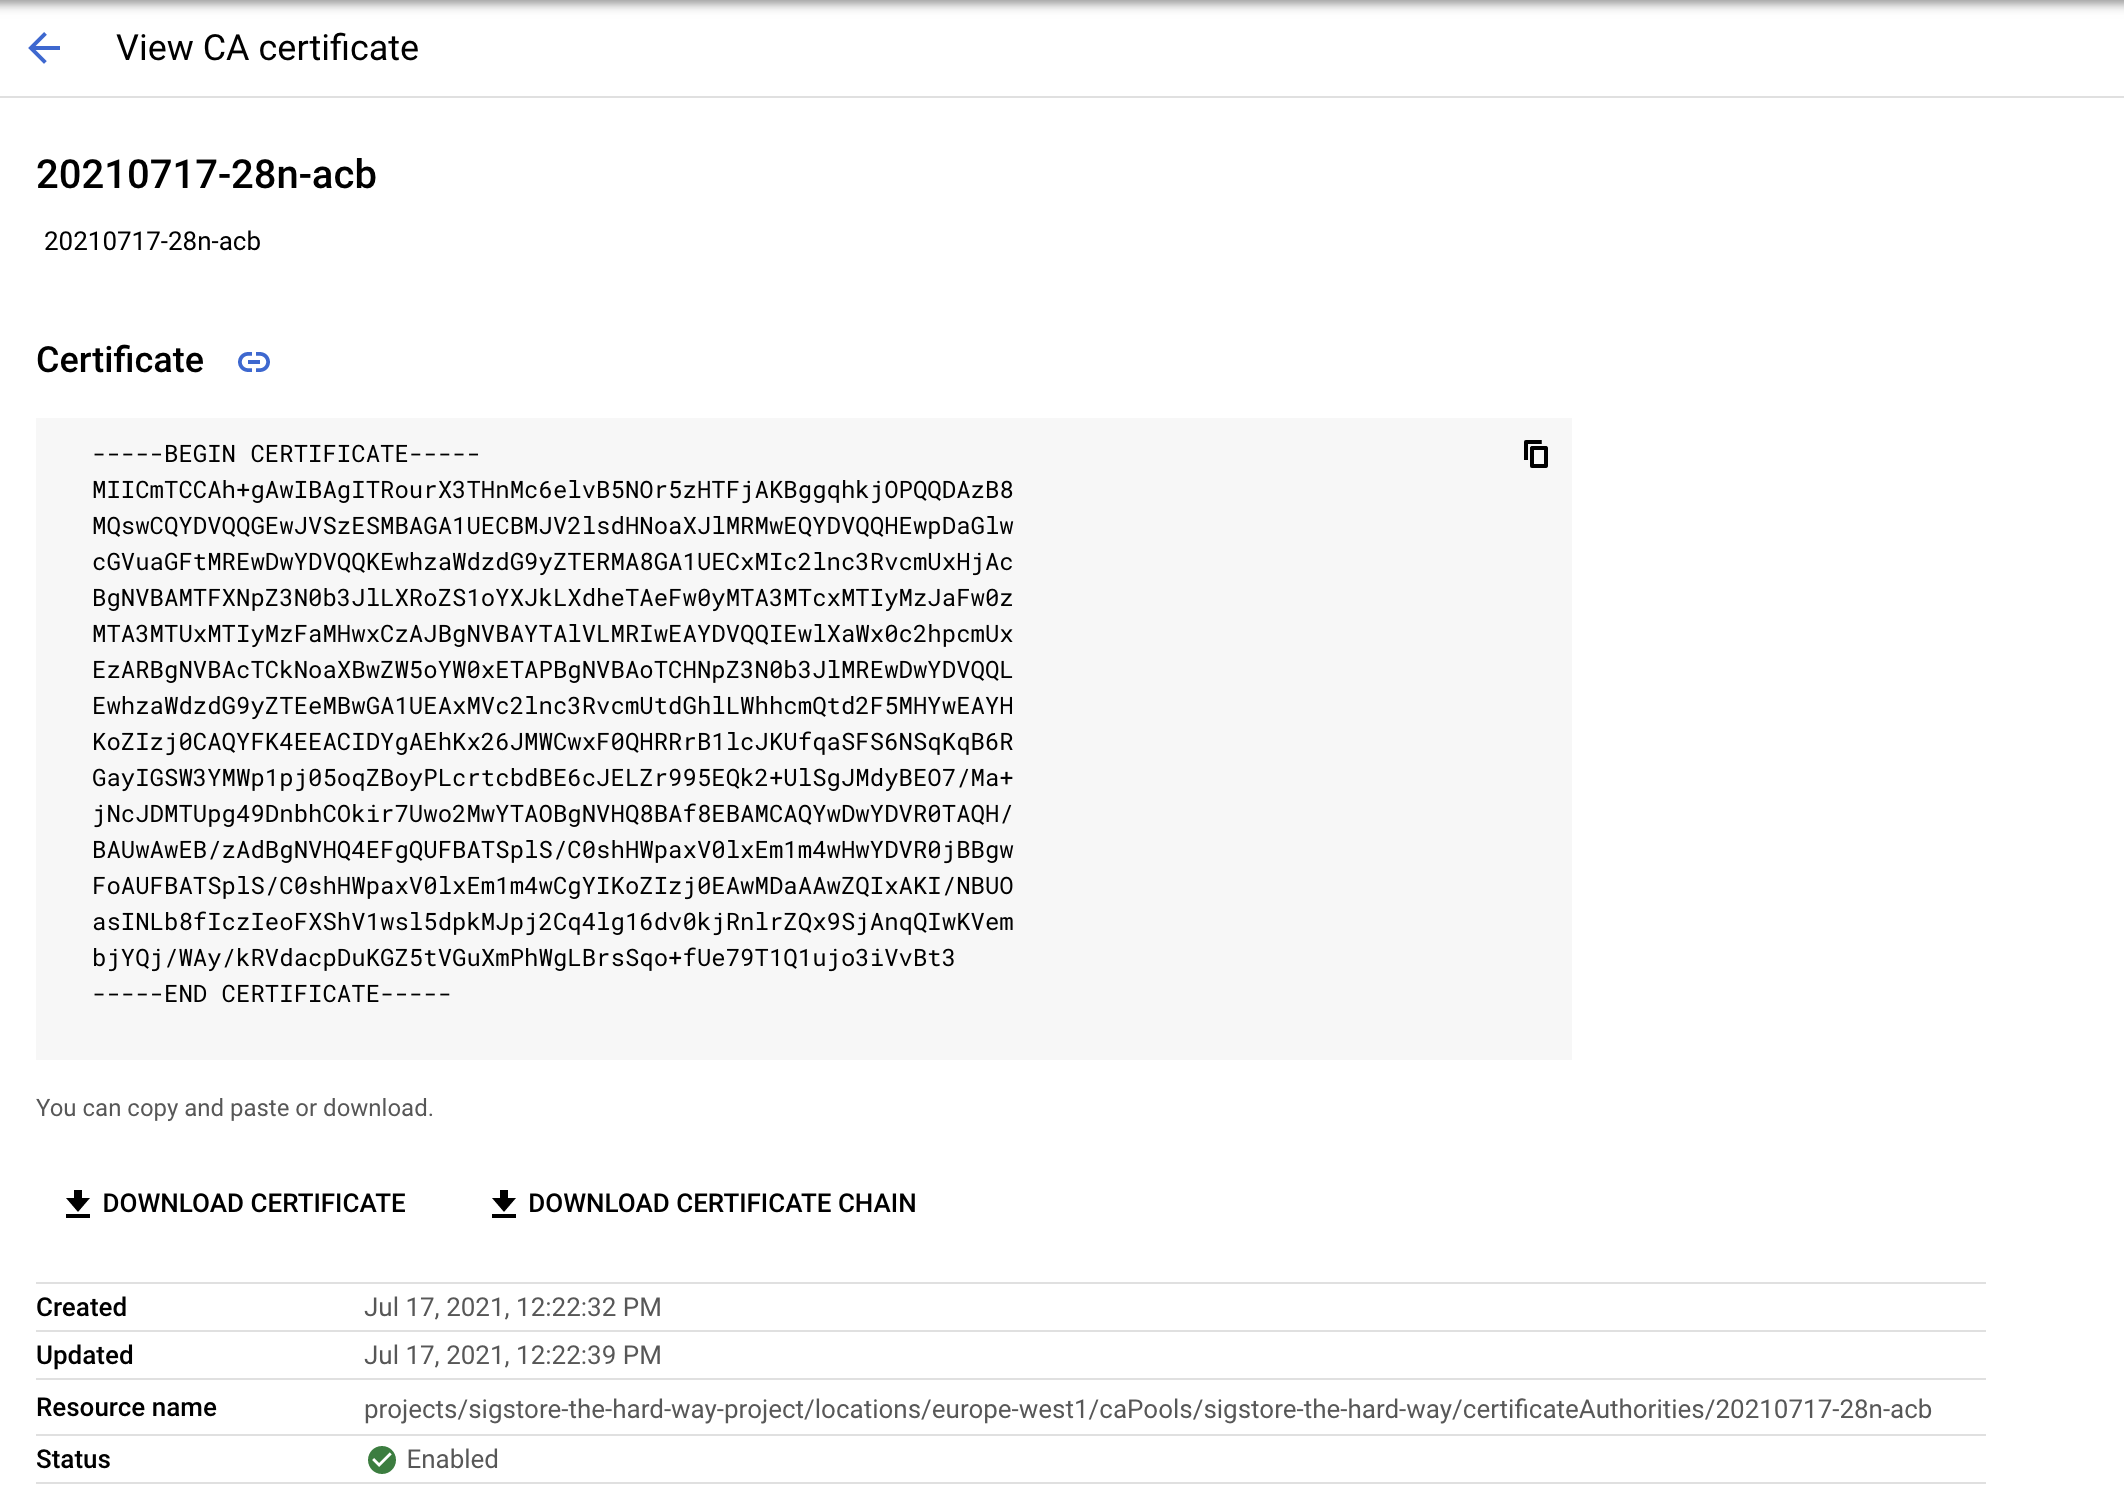
Note down the Root CA and Resource name
Fulcio Config
Set the DNS for the OAuth2 / Dex Server
OAUTH2_DOMAIN="oauth2.example.com"
cat > $HOME/fulcio-config/config.json <<EOF
{
  "OIDCIssuers": {
    "https://accounts.google.com": {
      "IssuerURL": "https://accounts.google.com",
      "ClientID": "sigstore",
      "Type": "email"
    },
    "https://${OAUTH2_DOMAIN}/auth": {
      "IssuerURL": "https://${OAUTH2_DOMAIN}/auth",
      "ClientID": "sigstore",
      "Type": "email"
    },
    "https://token.actions.githubusercontent.com": {
      "IssuerURL": "https://token.actions.githubusercontent.com",
      "ClientID": "sigstore",
      "Type": "github-workflow"
    }
  }
}
EOF
Inspect config.json and if everything looks in order, copy it into place
mv config.json $HOME/fulcio-config/
Start FulcioCA
We now have three methods of starting Fulcio depending on your Certificate Authority system choice.
In each case you may create a bare minimal systemd service. Note
that the systemd service uses /etc/fulcio-config as the working
directory, being a system-wide service, while the examples earlier used
$HOME/fulcio-config. Copy the config.json file as appropriate.
cat /etc/systemd/system/fulcio.service
[Unit]
Description=fulcio
After=network-online.target
Wants=network-online.target
StartLimitIntervalSec=600
StartLimitBurst=5

[Service]
Environment=SOFTHSM2_CONF=/etc/fulcio-config/config/softhsm2.cfg
ExecStart=/usr/local/bin/fulcio serve ...
WorkingDirectory=/etc/fulcio-config
Restart=on-failure
RestartSec=5s

[Install]
WantedBy=multi-user.target
sudo systemctl daemon-reload
sudo systemctl enable fulcio.service
sudo systemctl start fulcio.service
sudo systemctl status fulcio.service
File CA
fulcio serve --config-path=$HOME/fulcio-config/config.json --ca=fileca --fileca-cert=$HOME/fulcio-config/fulcio-root.pem --fileca-key=$HOME/fulcio-config/file_ca_key.pem --fileca-key-passwd=p6ssw0rd --ct-log-url=http://sigstore-ctl:6105/sigstore --host=0.0.0.0 --port=5000
SoftHSM
fulcio serve --config-path=$HOME/fulcio-config/config.json --ca=pkcs11ca --hsm-caroot-id=1 --pkcs11-config-path=$HOME/fulcio-config/config/crypto11.conf --ct-log-url=http://sigstore-ctl:6105/sigstore --host=0.0.0.0 --port=5000
📝 Don't worry that the Certificate Transparency Log is not up yet. We will set this up next.
Google Certificate Authority Service
fulcio serve --ca googleca --gcp_private_ca_parent=${resource_name} --ct-log-url=http://sigstore-ctl:6105/sigstore --host=0.0.0.0 --port=5000
📝 Your resource name is a long POSIX type path string, e.g.
projects/sigstore-the-hard-way-proj/locations/europe-west1/caPools/sigstore-the-hard-way/certificateAuthorities/xxxx
For example
fulcio serve --ca googleca --gcp_private_ca_parent=projects/sigstore-the-hard-way-proj/locations/europe-west1/caPools/sigstore-the-hard-way/certificateAuthorities/xxxx --ctl-log-url=http://sigstore-ctl:6105/sigstore